Hello everyone!
Thanks so much for reading my last post, How to start making phages for therapy. In that post, I talked about how at Phage Australia, we have patients who need phages, a grant-funded mandate to make, deliver and monitor phages (hopefully to be renewed/bolstered later this year), and I’m part of a team getting the first functional version of that system up and running. This post is a continuation of the first, where I share an update on how things are going.
I’m writing this ‘lab series’ as a way to get my own thoughts organized and find gaps in my logic/knowledge as I go, and I hope it can be helpful to others working in the same space (ideally, we would all be exchanging notes!).
Landing on an ‘optimal’ phage-making process
In my last post, I attempt to rein in the chaos in my brain surrounding how to ‘optimally’ make phages without getting overwhelmed by optimization creep and option paralysis. There are so many options after all!
When I ended the last post, I was awaiting results to find out how my choice of methods worked. Today, I have them for you!
Recap
My decision-making framework
- Decide what I’m optimizing for (what would success look like?)
- Break the project into its core components
- For each core component, make a list of what my options are
- Filter for materials I have access to
- Make a choice of one thing to try first for each step (and document why!)
My success metrics
- Enough phage (10^12 PFU after all steps)
- Low enough endotoxin (under 350 EU per 10^9 PFU)
The first set of steps I decided to try
- Propagate phages using a single set of growth conditions
- Remove bacterial debris using standard centrifugation and filtration
- Concentrate phages using Amicon spin column
- Remove endotoxin using octanol
- Remove octanol using dialysis
What I decided to measure
- I decided to check phage titre (by plating a dilution series and counting plaques) between each step, and stop (and go back to the start) if I ever had a phage titre that was below my minimum.
- I decided to check endotoxin only once, at the very end.
The phage I used first:
- Ec134b, a (mostly uncharacterized) E. coli phage in the Iredell lab collection, because this phage was a hit on one of our patient isolates.
How the process went
Long story short, the protocol hit my target for low enough endotoxin, and it almost hit my target for enough phage! So we’ll be using this process as our default going forward.
Here’s a run-down of what I did for each step, the titres I got at the different steps, and some commentary on how it felt/anything that was overly laborious:
Here’s the slideshow I recently presented to our lab to show these results, if anyone is curious.
1. Propagate phage
I chose one set of growth conditions to start (150 mL LB + 1mM CaCl2 + 1mM MgCl2, 120 rpm, 30C overnight, inoculated with one ‘plaque plug’ as done by Luong et al. 2020. It led to about 10^10 phage per mL (x 150 mL = just over 10^12 total PFU!)
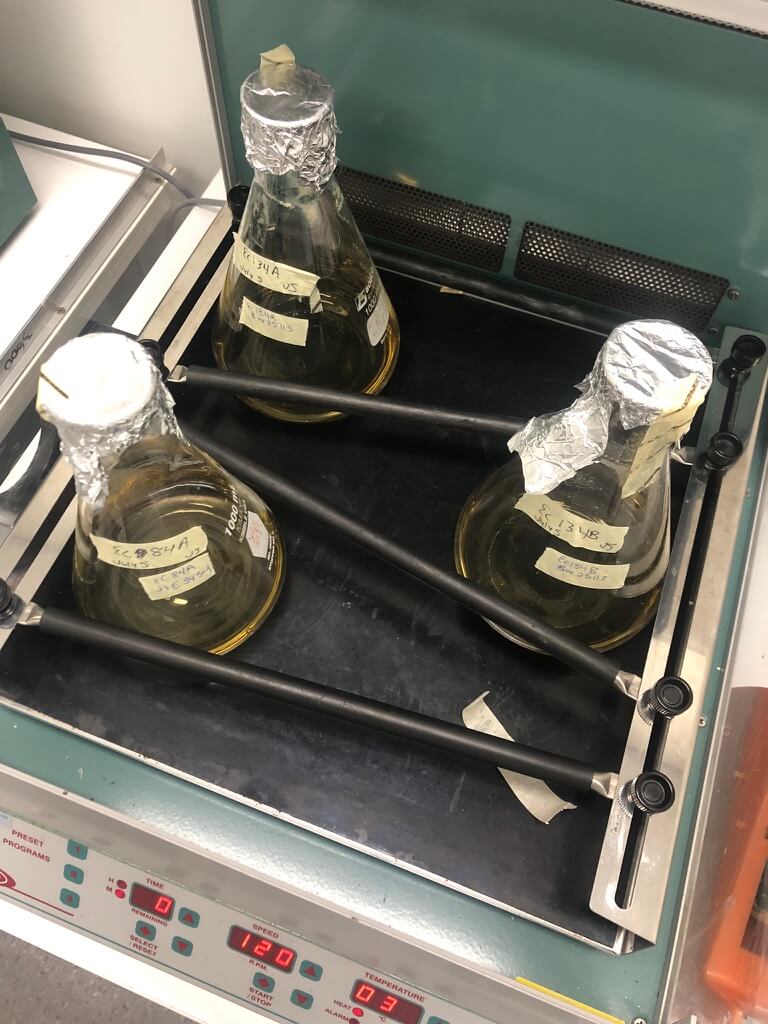
Figure 1. I propagated phage in small (150-mL) liquid cultures in standard glass Erlenmeyers.
2. Remove bacterial cells & debris
This step was easy — nothing special, centrifuged and filtered through 0.22 um filter; worked fine.
3. Concentrate the sample
I used Amicon spin column (50 kDa) — it worked great! Minimal phage losses. Took hours of 5 min spins though — definitely open to a less laborious method.
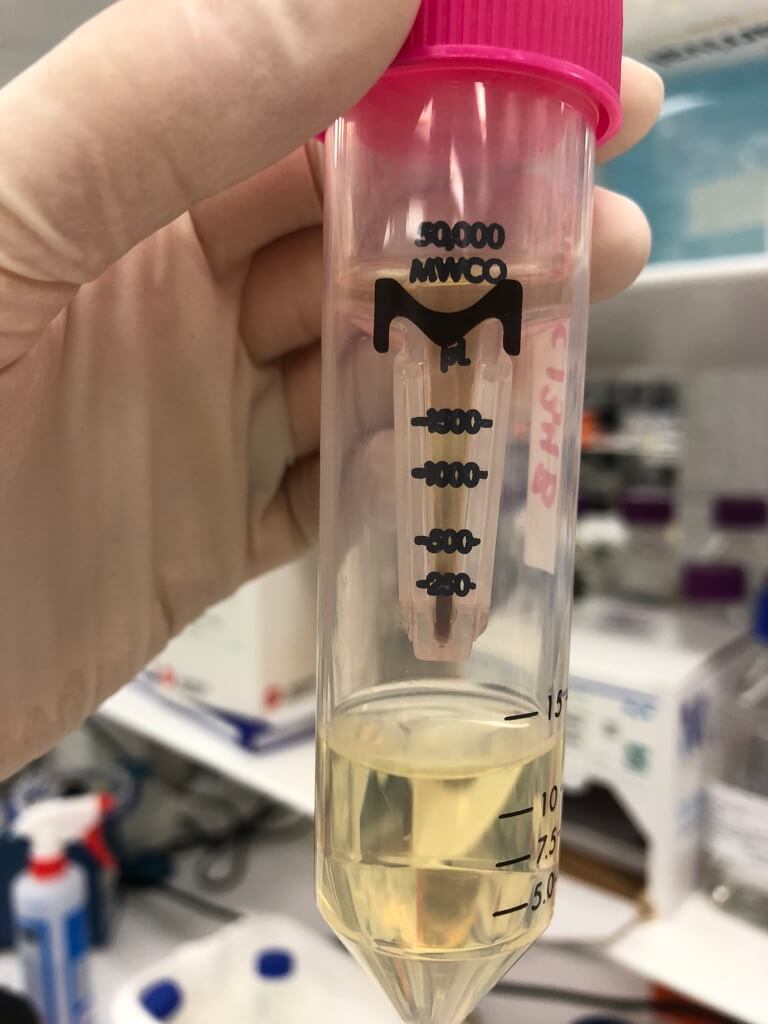
Figure 2. The 50 kDa Amicon spin column worked well. Notice the brownish colour — this picture was taken after I put 100 mL of phage lysate (10-15 mL at a time) through the column.
4. Remove the endotoxin
I used octanol — also went great! Not laborious really. No real issues here.
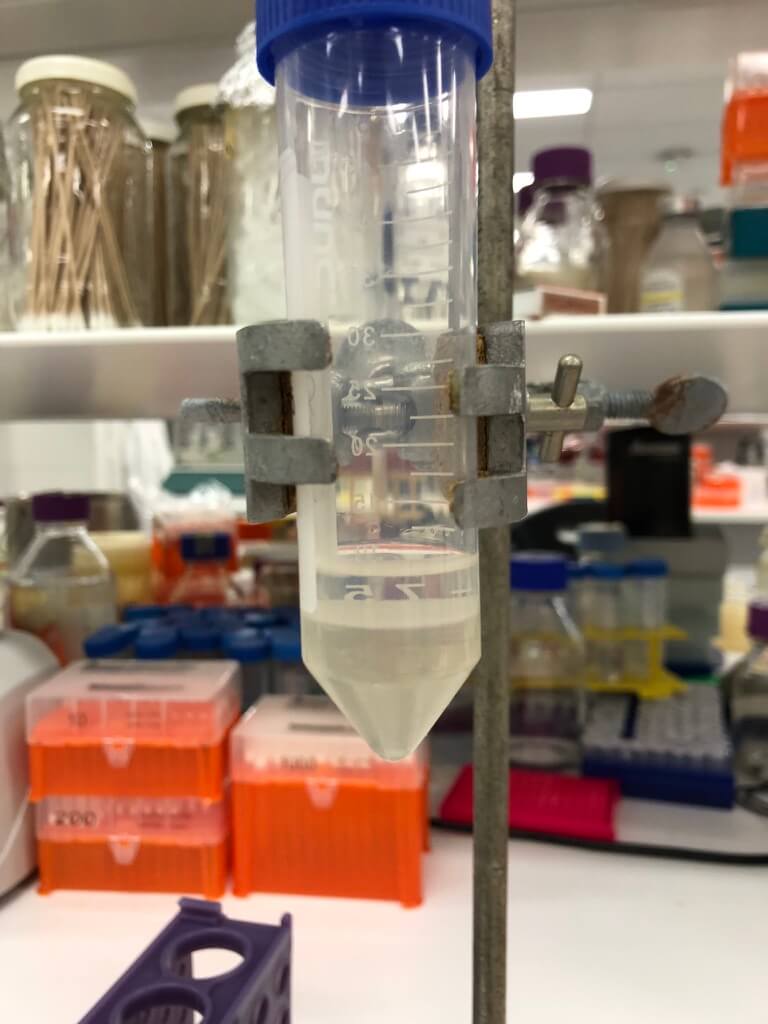
Figure 3. After mixing phage with octanol, two layers form: the bottom (aqueous) layer contains the phage. I extracted this by piercing the tube with an 18 gauge needle attached to a syringe.
5. Remove the octanol
I used dialysis — this was fairly laborious to set up (but would be easier now that I’ve scavenger-hunted around the lab and have all the materials, and have reminded myself of how to set it up). It took several days, and uses several litres of ethanol to do just one prep (I drained our lab’s supply). So I’d love to replace this method.
I’m also not sure if it worked to get rid of the octanol, because we actually don’t have a way to test it. But it’s been published as being used in patients, and octanol is considered fairly safe. Especially when diluted out, which we would do with our phage preps (probably about 100x for this one), it seems that we’ll be okay here. Still, we’re actively looking into getting insight from the pharmacopeia (the big list of rules re: what you can use in a medicinal product) and from chemists we know to see what we should reasonably be doing to cover our bases and make sure we’re not introducing an unsafe component into the patients.
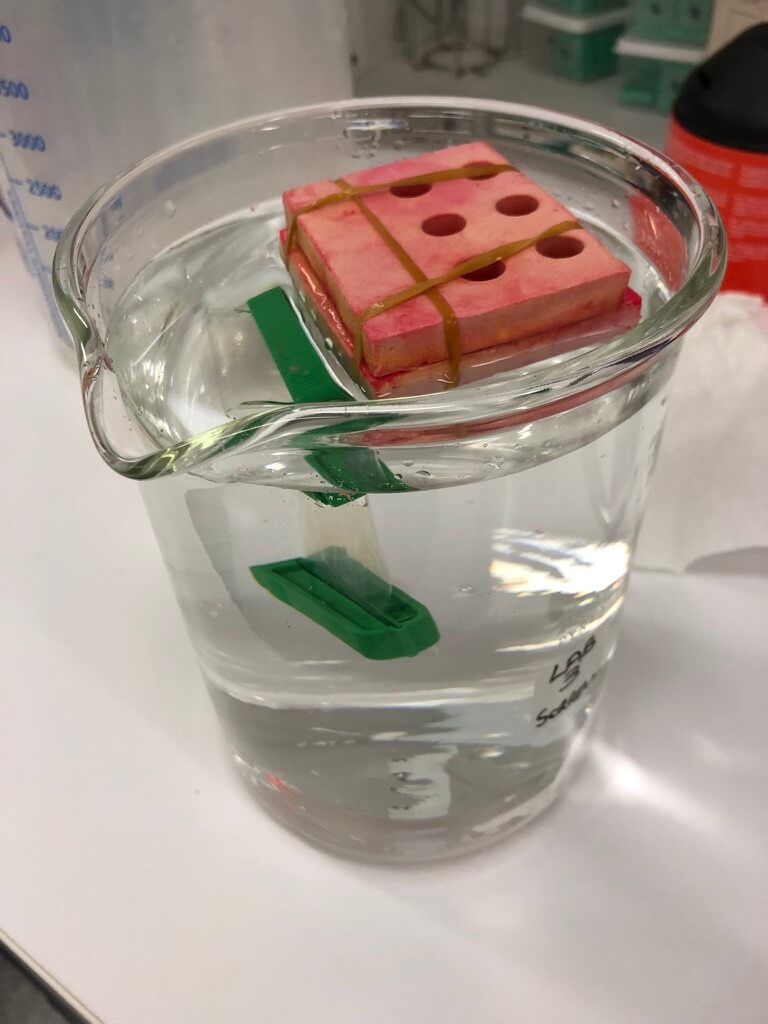
Figure 4. My dialysis setup. This is a 2-L beaker.
Looking at the end product: how did it measure up?
Success metric 1: Enough phages?
Successful if: we achieve our min per-batch phage amount (10^12 PFU)
After the initial propagation (and filtration to remove cell debris), I had a total phage count of about 2 x 10^12 PFU. After concentrating, I still had pretty much the same amount (2.7 x 10^12). After endotoxin removal, I had 1.1 x 10^12 — still meeting my minimum, which was exciting!
The final step I did, filtering that last solution through 0.22 um (a step I added in at the end for good measure, to ensure a sterile prep), seems to be where I lost some phage. It went down to 4.5 x 10^11. I will revisit whether this step is necessary, otherwise I may skip it, or else keep it and consider increasing the input of phage at the beginning.
Still, even with the losses, my final phage amount was good enough for almost 500 doses, which is still plenty, since I gave myself some wiggle room when setting the success parameters for phage amounts.
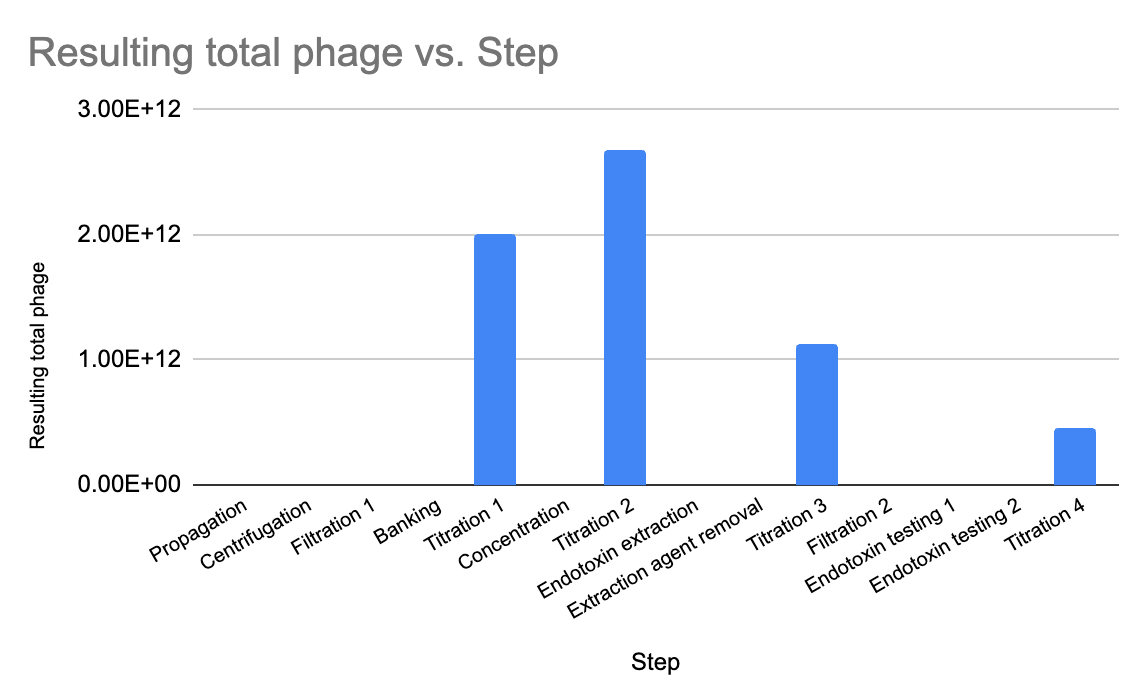
Figure 5. I used a plaque assay to measure titre at several steps during the process, always checking to see that my 10^12 PFU (total) minimum was being hit.
Success metric 2: Safe enough?
Successful if: we get below max endotoxin conc. (5 EU/kg/h, ie. 350 EU per dose of 10^9 PFU)
This was the big question — after all that, was the endotoxin actually reduced enough? Excitingly, after some difficulties getting the endotoxin kits to work with our spectrophotometer, we got our answer (by switching to a kit made by a different manufacturer [Charles River]— thanks to Ali Khalid for making this happen, and doing the test for me even though he’s mid-thesis writing!).
The final value was 618 endotoxin units (EU) per mL, which works out to about 1.35 EU per dose of phage, if a dose is 10^9 PFU/mL). So this means we have about 500 doses of phage with low enough endotoxin to use in patients. Yay! And most importantly, it means we have a process that we can use as a starting point for future phage-making. Double yay!!
Looking ahead: how might we turn this into a GMP process?
Now that we have a basic minimal working phage-making process, I can start the next step, which I am (nerdily) very excited about: creating a system for documenting everything! This is core to our team’s long term reasons for doing this phage-making method development, which is to set up a GMP (Good Manufacturing Practice) facility to support Phage Australia.
What I’ve been learning is that with GMP, it’s not one special set of things you have to do. GMP means knowing what you do (ie. having a process), and showing that you do it (ie. documenting it all). So that means having detailed Standard Operating Procedures (SOPs) for every step (even, I’m told, things like ‘transporting the material to another room’), and detailed data collection that happens at every step to support that it’s all been done properly.
Without SOPs, no GMP. But without a protocol that works, there’s no point meticulously writing out the SOPs. Well, now we have a baseline protocol that works, so it’s time to start writing out the protocols, deciding what to document at each step, and starting to hold ourselves to that. (Because the phages we’re making now are for actual patients, after all).
Building a ‘master phage-making template’
I’m now working on what I’m calling a ‘master phage-making template’ that we can use to bring ourselves closer to the kind of protocol and documentation practices we’ll need if we ever want a process that can meet GMP standards.
Why? Because we can’t just be scribbling in the margins of printed-off journal methods sections when we’re making therapeutic phage products for humans, somehow ‘hoping’ we find the time to come back and ‘document everything properly’ later. (I’m sure it’s not just me who has the best of intentions, but constantly wonders why ‘later’ never seems to come). I used to think it was my fault for being lazy, now I believe it’s a flaw in the system as designed.
We also can’t rely on paper notebooks alone, which disincentivize detail because it’s so laborious to write out what you did (not to mention: isn’t searchable, isn’t compatible with linking to data sources, images, etc).
I’m designing my master phage-making template to hit a bunch of key things: what to do (protocols), a place to write observations at each step (a new copy of each needed protocol, freshly generated and connected to each new use of the template), a place to input results as they’re generated, and ‘decision points’ (prompts to cause reflection / decide whether to proceed based on the results).
I’m envisioning a happy medium between Big Scary GMP Standard Operating Procedures and scrawling in the margins of our dog-eared, always slightly damp copies of journal articles. At this point, I feel like I’m writing the ‘undergrad lab manual version’ I wish I had to do all this work, but for the digital age.
It’s shaping up into something I’m really excited about (my past self would be shocked I’d be unironically excited about something that is essentially ‘documentation’). I can’t wait to share it with you all here!
Resources that helped me

